
Tutorial: Proper Use of Spot Metering
Prologue: In a prior article re-published from 2012, I mentioned I liked Evaluative metering on the Canon SX50 and at the time the article was originally written was using Evaluative metering 80% of the time and Spot metering 20%. I really like Canon’s Evaluative metering, even today, because as indicated by the above percentages it pretty well nails the exposure often enough that not a lot of post processing is required. That is, as I’ve mentioned before, with -1/3 EC dialed in for daylight as a default. Over the years since that article was written, I’ve switched those percentages to 80% Spot metering and 20% Evaluative on all my cameras. I have become very appreciative of the higher control Spot metering allows with a resulting further reduction in the need for post processing. In May 2013 in response to questions on camera metering, I wrote the now slightly edited following tutorial on spot metering (Note that images may be clicked on to see them enlarged in my Blog Gallery, but may not be downloaded):
I like evaluative metering for its ease of use, but many times the lighting may be too difficult for Evaluative mode to properly handle, or the photographer may want to enhance certain qualities of the light. So changing to the Spot mode is necessary. From reading a number of discussions on forums, I see that many people do not have a clear idea on how to properly use the Spot metering mode.
Many people believe that placing the Spot meter reading right on their main subject will give a proper exposure for the image. Now if the main subject gives off an 18% middle gray reflectance, they would be correct. This is because camera metering systems are calibrated to properly expose 18% gray. If a camera’s meter is pointed at a pure white (255,255,255 RGB reading) subject that fills the frame, the meter will underexpose to create an 18% gray image. If the camera is pointed at a pure black (0,0,0 RGB reading) subject that fills the frame, the meter will overexpose to create an 18% gray image. So unless the main subject is already 18% gray, it will almost never give a proper exposure when using the Spot meter. Why do I say almost? We’ll go through the proper three steps in using the Spot meter to find out.
The first step is the easiest. Look for an element in your scene that gives off an 18% middle gray reflectance and take the reading off that element. Generally, highlights, shadows and everything in between in the rest of the scene will be properly exposed within the dynamic range of the sensor. Now blacks may not be absolute black (0,0,0) and whites may not be absolute white (255,255,255), but a range of values between (28,28,28) and (245,245,245) is quite acceptable even for the better cameras. But what does 18% gray look like? There are many tools (color pigment cards) available and sources on the net that will give you examples. For my professional work, both studio and outdoors, and many times for my personal work, I include a color checker card in a test exposure to calibrate the final images to in post. Once you’re used to seeing this color on the cards, you also become used to finding it in nature. And don’t worry if you do not find an exact 18% reflectance. Any of the middle grays in the area surrounding 18% usually work just as well.
Step two is necessary when you cannot find any elements in the scene that are at or near 18% gray. Now you must get a little creative and point the Spot meter to an area that has a combination of light and dark tones that average to 18% gray. It may be a combination of medium light tones and medium dark tones that fall under the area of the Spot meter, or a combination of very light tones and very dark tones, as long as the average is around 18% gray. This is what I meant above that pointing the Spot meter at your main subject may sometimes work, because the main subject may have a good mix of tones close to 18% gray.
Are we finished? No, there’s a step three that depends on the photographer’s overall vision for the tone of the picture. If the main subject is very light against a dark background, even the spot meter will tend to keep that balance. By changing the mix of tones in step two to include more lighter elements than dark, the exposure will be decreased to better handle the highlights (which is difficult for the sensor) while not detracting too much from the shadow detail (easier for the sensor). By making changes to the mix that the Spot meter reads, you can emphasis the tonal presentation of the light in the whole image, lighter or darker, to reflect your vision.
Look again at the process outlined in steps two and three. Re-written slightly, they would be a pretty good description of what the camera is doing to multiple elements across the entire scene in Evaluative metering mode. It’s the reason Evaluative mode works so well and so often.
I have two examples of the proper use of Spot metering, one from my files and a new image I photographed this morning for this article. First, here is the older image:
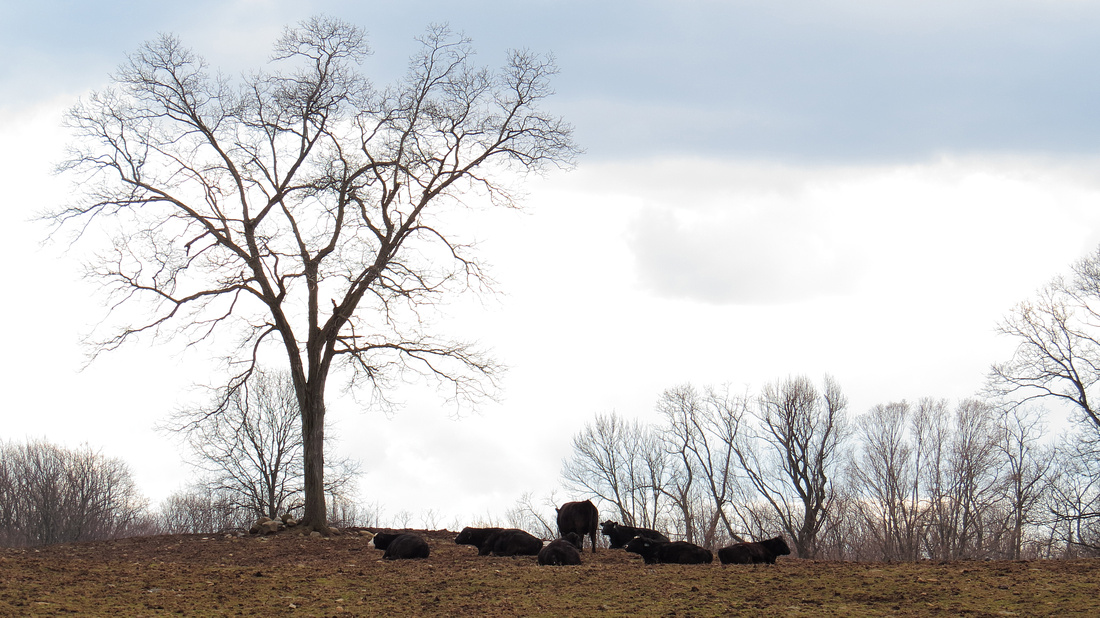 130313_0663_SX50 Cattle in the Pasture near Rockefeller PreserveReturn to the Spot Metering Tutorial by clicking here http://edwardmichaellach.zenfolio.com/blog/2016/4/tutorial-proper-use-of-spot-metering
 Spot metering was placed on the clouds and trees near the horizon with a little bit of the three right cattle included.
Using Evaluative metering for this image with a very bright sky portrayed the pasture and cattle as much too dark with little texture or definition. Although the upper clouds are very close to middle gray and pointing the Spot meter at them lightened the bottom of the scene, it was not enough for the image I wanted to portray. Instead, I pointed the Spot meter at the same color clouds near the horizon to the right of center that were mixed with the darker branches of the trees. I further moved it down slightly to capture a little of the three right cattle. The pasture now would light up enough to give me the image that was in my mind’s eye. The sky may have lost a slight bit of texture, but that was more than compensated for by the detail in the shadows.
The second image taken this morning is a portrait of a newly blooming Iris in my eastern gardens, just as the rising sun broke above the cloud covered hills:
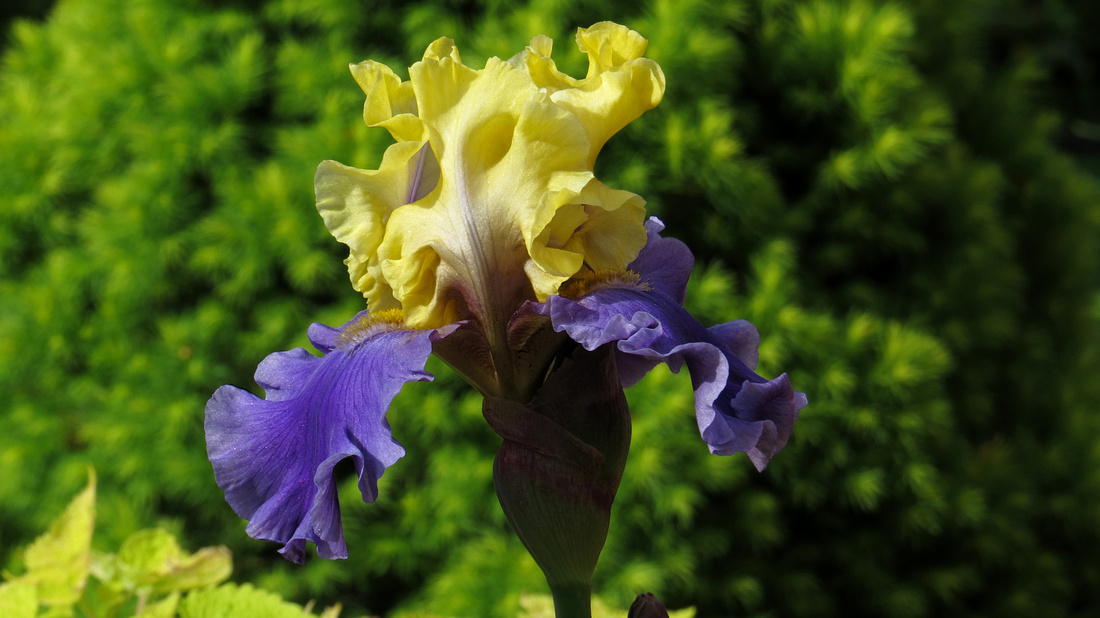 130517_0810_SX50 IrisReturn to the Spot Metering Tutorial by clicking here http://edwardmichaellach.zenfolio.com/blog/2016/4/tutorial-proper-use-of-spot-metering
This is a case where pointing the Spot meter right at the subject worked. See the text.
130517_0810_SX50 IrisReturn to the Spot Metering Tutorial by clicking here http://edwardmichaellach.zenfolio.com/blog/2016/4/tutorial-proper-use-of-spot-metering
This is a case where pointing the Spot meter right at the subject worked. See the text.
Evaluative metering in this case was blowing the delicate yellow highlights. Turning down the EC was helpful but started robbing too much detail and texture from the shadows, especially the stem. Now there is no obvious middle gray, but it turns out that this subject allowed me the creative use of the usual rules by pointing the spot meter right at it. In the middle of the image on the flower was a combination of light yellows and medium violets with a touch of dark shadows. This area produced a Spot meter reading with a very even combination of highlights and shadows with good texture and contrast, a combination close to the tonal values near middle gray. And a combination that would produce the beautiful portrait lighting my eye envisioned.
I hope this has been useful to those who want to get the most from the Spot meters on their cameras. As I said, Evaluative metering is very good in many lighting situations, but sometimes you need that little extra help. And other times, the creative possibilities of Spot metering are endless.
Addendum:
A reader made a good point in mentioning Exposure Lock while using this process. That was definitely an omission of mine in writing the original article. In the case of the iris above, the correct exposure area was right in the middle of the image and it was not necessary to adjust the composition before pressing the shutter. This is highly unusual in Spot metering. Taking the reading off center like with the above cattle in the pasture is more likely and I did use Exposure Lock. Many digital cameras have an Exposure Lock button (AEL) that is a very helpful feature I would not be without. As its name implies, pressing it locks the Spot exposure reading, allowing the photographer to next choose the focus point of most interest (and a camera with AEL will also have AFL to lock in focus), and finally recompose and capture the image. This process works best by attaining preliminary focus first before metering, then fine tuning the focus with AFL before the final press of the shutter button.