
Tutorial: Compression/Expansion of Space in Photography
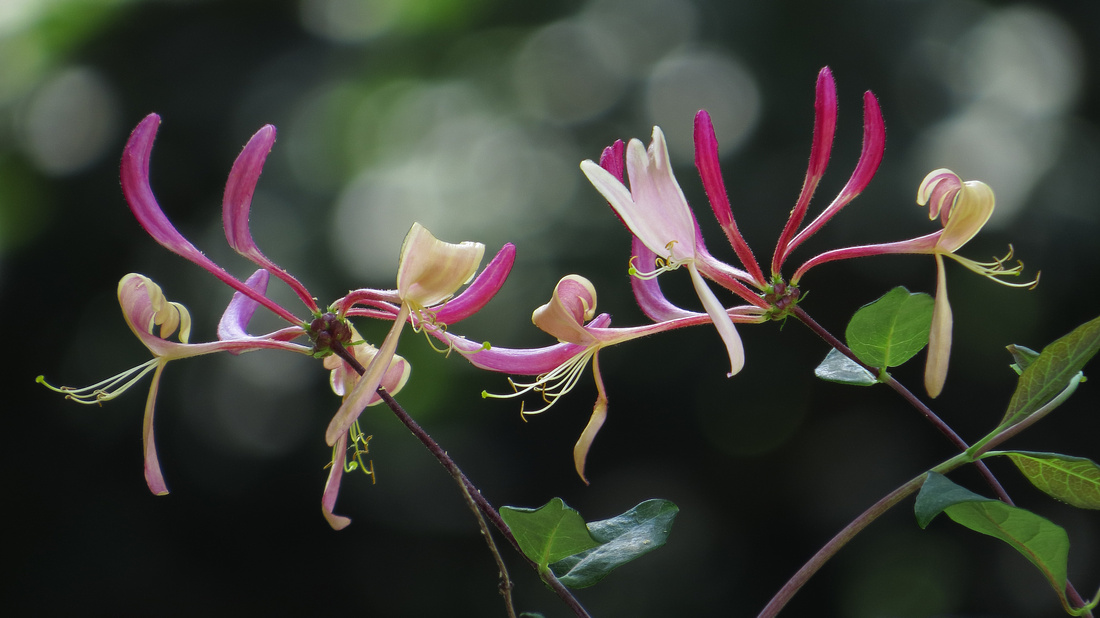
When displaying images in a photography forum, the resulting discussion can take many directions. One such image allowed me to write about some misunderstood “rules” of compression and expansion of space in photography. The blooms in the following image appear to be very close together, and yet in reality were almost two feet apart. Knowing how different focal lengths at different distances from a subject can produce entirely different presentations of an image can lend to wonderful creativity in photography.
 140804_2285_SX50 HoneysuckleReturn to the Compression/Expansion of Space Tutorial by clicking here
http://edwardmichaellach.zenfolio.com/blog/2016/4/tutorial-compression/expansion-of-space-in-photography
The appearance of a delicate close relationship of the blooms on this Honeysuckle vine was attained by stepping back and increasing the focal length to extreme telephoto to compress the space while maintaining the desired composition.
There is reasoning behind this technique and purists who know about the "science" of our craft will cite the "absolute" rule that stepping forward will always expand the appearance of a subject in space and moving backwards will always compress it. While basically true in a relative sense and when applied to the above image, this rule can be misleading in many practical artistic applications. Every focal length has a focus distance at which the subject appears natural in space. Move closer than this distance and the subject will have a sense of expansion. Move further and the subject will have a sense of compression. Clarifying the misleading part of the "absolute" rule is that as long as the subject is between the minimum focus distance and the focus point where it appears natural in space at any focal length, it is then that the subject will always appear expanded in space. When moving beyond the focus point where it appears natural at any focal length, it is then that the subject will always appear compressed in space. The shorter the focal length, the further away the focus distance at which the subject appears natural in space, thus the greater the focus points that appear expanded. The longer the focal length, the closer the focus distance at which the subject appears natural in space, thus the greater the focus points that appear compressed. This makes sense in application as one usually stands relatively closer to a subject when using a short focal length wide angle lens (expansion), and further away when using a long focal length telephoto (compression). This also answers a question I often get, "I moved back from my subject, why doesn't it look compressed like the rule says it should?" Knowing the rule is one thing. Understanding the application of the "rule" makes for a more creative photographer.
Most people use the different focal lengths of a zoom lens to avoid taking steps. But one of its many benefits as shown here, once you've determined a particular composition, is that stepping back and forth with the zoom can be used in a real dance of changing focal lengths and focus distances to choreograph creative senses and emotions in photography.